DIY caravan fridge fans, for under $40!
Is your gas (2 or 3 way) caravan fridge not staying cold in summer like mine was? Well, he’s a pretty easy and cheap solution!
Having lived with a gas fridge in the past I know how inefficient (or totally useless!) they can be on hot days. Often I’d see every second van with the fridge vent off trying to help exhaust the hot air. My mum had a similar issue so I decided to put in a small computer fan hooked up to a switch so she could turn it on and off as it got warmer. There were a few problems with this, the first being that 12v PC fans don’t really like excess voltage, so because her battery was reaching 14.5v whilst charging the fan didn’t last very long at all.
When I purchased our second van, I was determined to get something that would not only rectify the issue, but do so without me having to think about it. I decided to hit trusty old ebay to see what I could find, surely someone had come up with something to rectify this issue so many people have. Sure enough, people had, the problem is they were wanting well over $100 for it. Being enjoying a bit of DIY, I set about designing my own kit.
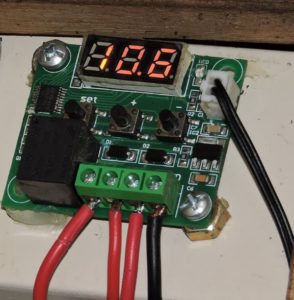
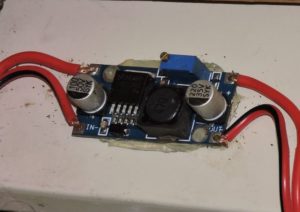
For $5 (delivered!) I found a digital thermostat which would allow me to have the fans turn on and off automatically at a pre-set temperature, Win! I still had the problem of trying to regulate the voltage so I didn’t fry the PC fans. 5 minutes and $8 later, I had an adjustable voltage regulator on its way! Oh how I love ebay.
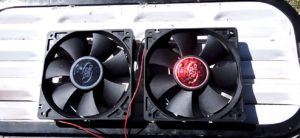
Next was to find some fans, now being an ex IT ‘nerd, I went straight for some Hydro bearing fans. Basically, these are a modified version of a ball bearing fan which is fluid filled. This increases life and also reduces noise. You could buy cheaper fans for as little as $2 delivered, but i don’t fancy having to replace them, nor do I want something so noisy it keeps me awake are night, so I forked our for 3 Deepcool 120mm case fans for $24.50 delivered.
A week later, I had my goodies and got to work! Before wiring anything up for good I did some testing to make sure it worked as anticipated. I hooked the voltage regulator up to my battery and turned the little screw until it was outputting exactly 12v. You can buy the little terminal blocks to connect the cables, however iI assumed they were included, so I just soldered the wires directly to the terminals. Once I had the voltage set I wired up the temperature control switch which was as simple as connecting the positive and negative and thermostat wires to the terminals and wiring up the 3 fans, done!

Wires from left to right: 12v from battery, 12v to fan, 12v from battery (Powers LCD), Negative from battery
Because I have 2 vents, I set up one fan at the bottom of my fridge to draw in cool air and 2 fans at the top to exhaust the hot air out. In hindsight, I probably should have done this in reverse as if I had 2 fans at the bottom it would have created a vacuum effect anyway, but at the time doing it the way I did made sense! I simply used sikaflex to mount the fans to the vent, wired them up and re-installed the vent. I sat the thermometer probe at the bottom of the fridge cavity so I could make the on/off temperature true ambient temperature.
On our first trial with these fans, it was a nightmare…. The fans were exhausting so much hot air that my fridge was far more efficient than normal and absolutely everything inside the fridge froze overnight on the same thermostat setting I’d always used… Ooops! After winding the fridge thermostat back about ¼ of the way it remedied this though.
Interestingly, because it was turned down lower, I started consistently getting 4 days longer per gas bottle, which when you’re a full time traveller like us, all adds up!
The fans, voltage regulator and temperature switch only use .2a/h of power, which considering the benefits, is power well used in my opinion!


